As an entrepreneur, one of your most important goals is to grow your email list with a email provider such as Convertkit. A large email list gives you the ability to reach a wide audience with your message and sell more products or services. In order to grow your email list, you need to use an email marketing service like ConvertKit.

I have used a variety of email providers in the past: Mailchimp, Flodesk to name two and they are great services. But they were both lacking some features that I have found with Convertkit. Here are some tips to get started.
Getting Started with ConvertKit
ConvertKit is an email marketing service that allows you to turn website visitors into subscribers and customers. With ConvertKit, you can collect emails from people who visit your website and then send them targeted emails based on their interests. ConvertKit makes it easy to segment your subscribers so that you can send them personalized emails that will convert them into customers.
Using ConvertKit, you can create opt-in forms to place on your website or blog. When someone fills out an opt-in form, they are subscribing to your email list. You can then send them follow-up emails and nurture them until they are ready to buy from you.
ConvertKit also allows you to create content upgrades. Content upgrades are lead magnets that offer additional value to your readers in exchange for their email address. For example, if you have a blog post about social media marketing, you could offer a content upgrade with tips for growing your social media following. Content upgrades are a great way to increase the number of people who subscribe to your email list.
A couple of weeks ago I wrote a blog post about selling printables for Halloween. At the bottom of that blog post I included an opt in for some haunted houses coloring pages that readers could receive. I also included those same pages to my email list, since they had already opted in, they should receive the same free content.
How to Create Forms
Creating forms and landing pages with ConvertKit is easy. Simply click on the “Grow” then “Forms” tab in your account dashboard.

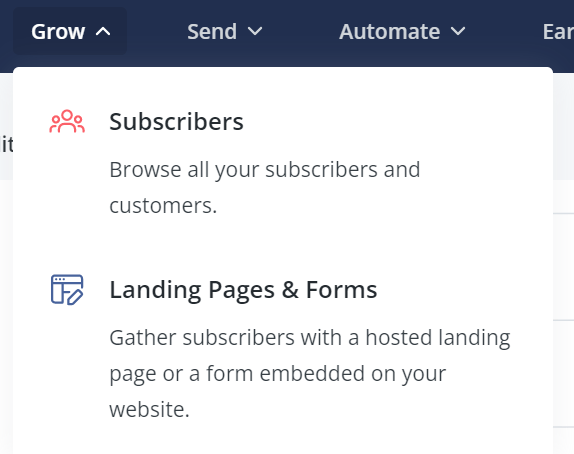
This brings up two options as shown above. Click on Landing Pages and Forms. If you already have forms created, it is easier to duplicate one you already have. If this is your first, click Create New.
This gives you the option to create a form or landing page. A landing page is great if you do not have a website but want to start collecting email addresses. It also works fine to host it on your own webpage. If you have an ETSY shop, you can send subscribers to a full page with more information about you, your products and create an interest.

But if you have an established website, I prefer the form. If you create forms, you can still use them for marketing on Pinterest and other social media platforms to send subscribers to an optin. And you can add those forms to your WordPress site so the optin form is added to every page and blog post.
You can have a default form and still have the option to change the form for specific blog posts. On my Halloween blog post, that haunted house optin works. But for a Valentine’s Day or Easter blog post? No, haunted houses may not be something those readers are looking for. Another seasonal optin would be created and added.

Inline forms will appear in one position on a page where they’re embedded like in the middle of a blog post or page. A modal form , modal forms will appear over a page (like a pop-up), and slide in forms will slide in to your page! The sticky bat form will appear where you place it, but I have never used this form. It appears to have some consistency issues.

You have a choice of different templates to use for a form. This are the templates for the modal form.

I tend to like the forms that have a place for an image on the left with some content on the right. I used the Charlotte form

You can customize the form to meet your own needs. Insert a copy of your optin, change the headline as well as the font/color and size of the font. You can also change the background color. To add a place for additional fields (like first name) click the plus sign in the middle of the form and select the field name. You can then drag and drop the fields to order them.
I personally do not add additional fields to the form. It is a personal quirk, but I have filled out a lot of forms that ask for first, last name, country/state as well as email address and it irritates me to give more info than needed. So here is the revised form for my Halloween Stickers. Notice that I changed the white background to orange, the button color to green, added a field for the first name and added an image of stickers.

Once you have created the form, give it a name—in this case it’s Halloween Stickers. Then Save. You will also need to create settings. Click on the settings tab and choose how you will deliver the optin. I use the “incentive tab” and enter the link to get the product after confirming the email address.
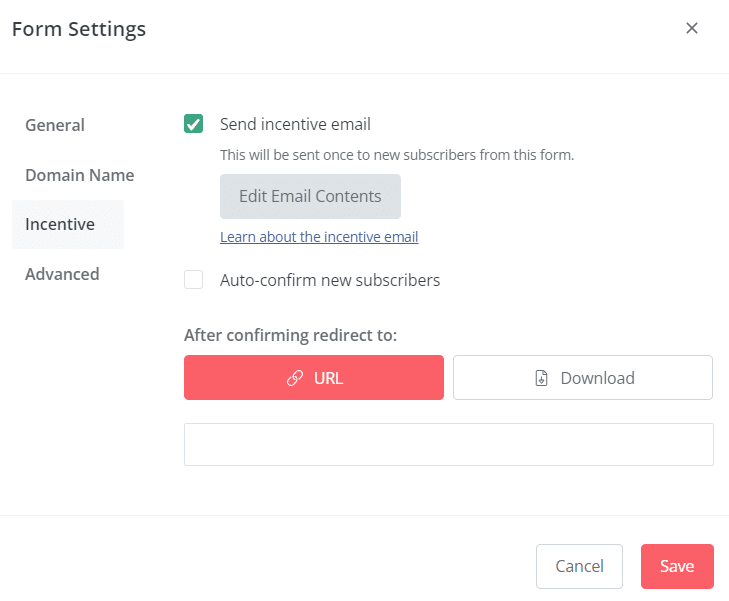
Make sure you also update your settings if you are using a duplicate form. This will give the reader a place to download the freebie, redirect to a Thank You page or other options., Once you’re finished customizing your form fields, click on the “Save” button. Now that your form is saved, you can embed it on your website or share it via social media or email. If you use WordPress, connect Convertkit to your WordPress account and each form you create will be added.
Other Ideas for Using Forms
ConvertKit is a powerful tool that makes it easy to collect email addresses from your lead magnets and content upgrades. You can establish a variety of Optins and forms for each and then swap them out on a regular basis to keep things fresh. You might want to have seasonal products to use and once the season is over, retire that optin until the following year.
Post these forms on your website, social media and especially Pinterest. Note that Pinterest takes 6-8 weeks to gather traction on different pins so for seasonal products you need to work ahead so those products are available early.
I hope this has been helpful. If you have not used Convertkit, give it a try. There is a free trial so you can check out the different features to see if it will work for you. CONVERTKIT
Looking for other tools that will make your work lighted and automate some processes? This blog post has my favorite tools to automate social media: 3 FAVORITE TOOLS FOR AUTOMATING SOCIAL MEDIA.
I mentioned earlier that I had used other services. I had looked at Convertkit and as a new online business owner 6 years earlier, I was overwhelmed with all the decisions and switched to a service that was simpler. But I came back. That says it all.