There are times when you will want to create a sequence in your email provider. A Welcome sequence is the most obvious time, but not the only time.

If you want to create a challenge of any type, then a sequence is perfect. Perhaps a customer purchases a particular product and you want to follow up with similar products, or instructions on using that product. Then you would set up a sequence that are auto delivered by email based on a tag.
First, let’s set up the sequence and see what information we will need to get started.
Create the Sequence
Once you log in, at the top bar, click “send”, then select sequence.

At the top of the bar, you will click New Sequence

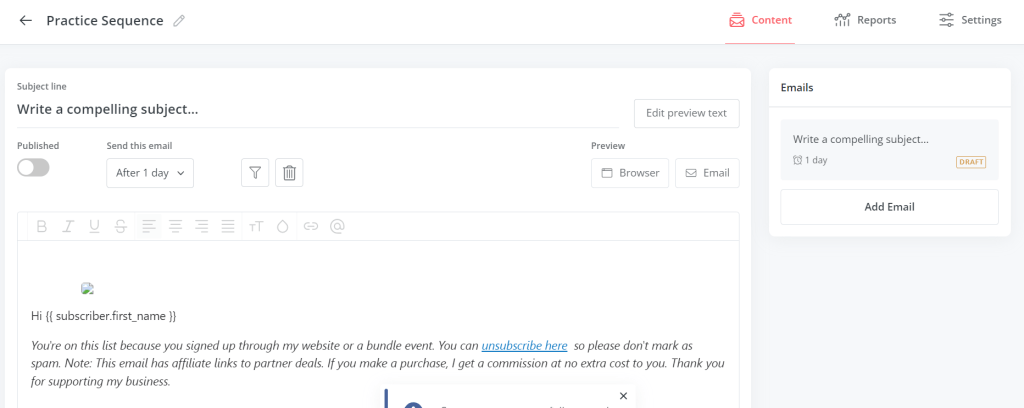
You will then give it a name. I use the name of the product, resource or lead magnet to keep things simple. Don’t worry about choosing a name, you can always change it later.

Then you will compose as many emails as you want and set up how often the emails are sent.

If you are doing a 7 day challenge, you want want a total of 9 emails in sequences. The first email is to confirm the sign up, and explain what participants should expect from the challenge, how often they will receive emails and if they need any supplies or tools.
The 7 emails are tips each day in the challenge theme and the final email (the 9th email) is a summary or what has been learned.
That last email could also include the next steps to take, refer participants to other resources or tools or ask for feedback. In general, you will have 2 extra emails. . The first is an introduction, the last is a conclusion.
I suggest that once you have composed your emails, you send a test email to yourself to check how it looks, and that it is delivered based on the tags.
Sequence Settings
Once you are happy with the emails, hit publish. In the sidebar, you can add as many emails that you want and rearrange emails as needed.
When you are writing the emails, you will select when the emails are sent. You can set it up for participants to receive the emails every day (1 day after last email sent) or any configuration of sending emails. Perhaps you want to set up the emails to send every week.
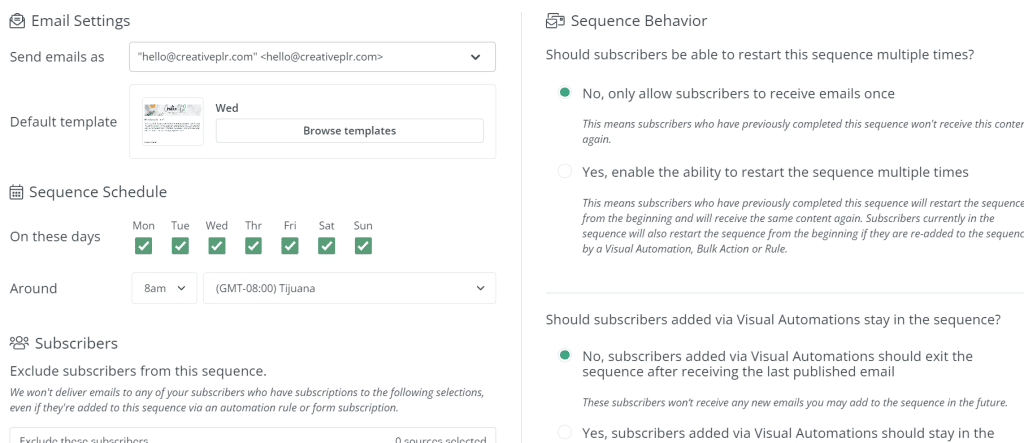
Once you have your emails finished, click on settings to set up the email settings. You will also have to decide if people participating will “exit” the sequence after the last email, be able to start the sequence again, can go back and view other emails, etc.

In settings you will also set up the time that emails are sent each day they are delivered. Need more info on creating Forms?
Adding Subscribers
You add subscribers using a landing page or form. Once the form is created you can share that form in your emails, website or through social media.
Create that form just as you would any other form. If you need help creating a form, then check out the previous blog post: A Beginners Guide to Convertkit Forms. If you are ready for other uses for Sequences, check out the post Automated Email Sequences.
Then add the form to a visual automation.

At the top of the bar, select Automate and then view all the choices you have. There are premade automations to invite subscribers to podcasts, newsletters, social media and webinars.
Create and “empty automation” to start fresh. You will need to have created the form already and then select the form or landing page in the drop down box.

I named my form “practice challenge” and selected it. Then you will click add event.

This will set up the automation and in order to include your email sequence, you will click on the plus sign (+) to add an action. The action will then add in this case an email sequence.

Other Uses for Sequences
A couple of popular uses for email automations are to welcome new subscribers and to have a challenge but there are other uses for this.
Do you have cold subscribers? Email subscribers who have not opened your emails in a while? Setting up a series of emails to revive your email list is another perfect use of this type of email automation.
You can also create an email automation that introduces new products, teaches customers some tips about a particular software or repurpose products that have been sold.